
This Alaskan fry bread is one I’ve adapted for life on St. Paul Island, where ingredients are simple and you learn to work with what you have. The dough fries up golden and crisp on the outside, soft on the inside, and makes a comforting base for both sweet and savory meals. It can be started in a bread machine and finished on the stove, making it easy to prepare even in a small kitchen.
Makes 12 pieces of fry bread
Ingredients
- 1 cup warm water, divided
- 2 tablespoons sugar
- 1 teaspoon active dry yeast
- 2 tablespoons avocado or vegetable oil
- 1/4 cup powdered milk
- 2 1/2 to 3 cups all-purpose flour
- 1 teaspoon salt
Instructions
- Proof the yeast first
In a small bowl, combine: 1/4 cup of the warm water, 1 teaspoon of the sugar, 1 teaspoon yeast. Let it sit for 5 to 10 minutes, until foamy. If it doesn’t foam, your yeast is dead or your water temperature was wrong. Toss out the non-foaming yeast and start again. - Load the bread machine
While the yeast is proofing, load the bread machine in this order: Remaining 3/4 cup warm water, oil, remaining sugar, powdered milk, flour, and add the salt in off to the side. Once the yeast mixture is foamy, pour it into the bread machine pan on top - Prepare the dough in the bread machine
Start the dough cycle. Watch the dough early. After about 5 to 10 minutes of mixing, check it. You want a dough that is: soft, smooth, slightly tacky, not dry or crumbly. If it looks too dry, add water, 1 tablespoon at a time. If it looks too wet and sticky, add flour, 1 tablespoon at a time. When the dough cycle is done, let the dough rest about 10 to 15 minutes if it feels tight. Divide dough into pieces, shape into balls, and flatten gently into rounds. Do not roll them paper thin. A slightly thicker center usually works better. - Fry dough
Heat oil to about 350 to 375°F. Fry each piece until golden brown on one side, then flip and fry the other side. Usually this takes about 1 to 2 minutes per side, depending on thickness. Drain on paper towels.

From the Table
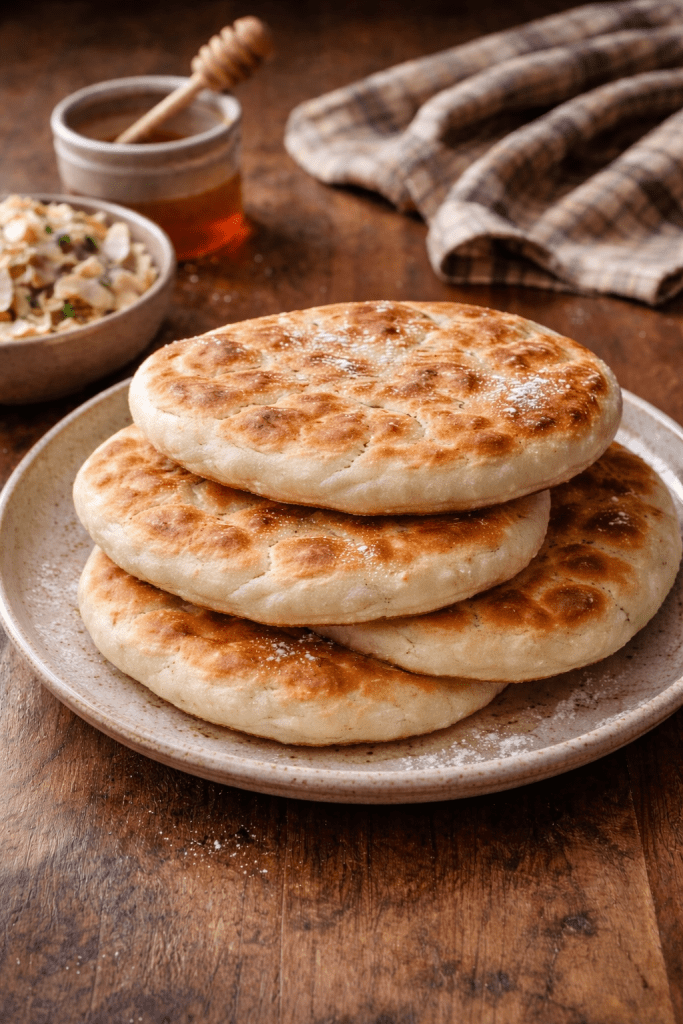
This is the kind of bread you can keep around, something that stretches across a few meals without much effort. It comes together quickly, finished right in the pan, with a light sweetness that shows up as it fries.
Around here, it usually ends up as the base for whatever we’ve got on hand, halibut salad, stew, even something simple like spaghetti sauce, the kind of thing you can pile onto without it falling apart. It’s just as good torn off and dipped in honey, and because it’s a little thicker, it holds up to whatever you put on it.
Field Notes:
Short-Term Storage (1–2 days):
- Cool completely on a wire rack before storing.
- Store in an airtight container or resealable plastic bag at room temperature (Do not refrigerate).
- Add a paper towel inside the container to help absorb excess moisture and prevent sogginess.
- Reheat in a dry skillet or 300°F oven for a few minutes to restore crispness.
Long-Term Storage (Freezer – up to 2 months):
- Cool completely, then wrap each piece individually in parchment or wax paper to prevent sticking.
- Place wrapped pieces in a zip-top freezer bag or airtight container.
- Label with date.
- To reheat: thaw at room temp, then warm in a skillet, oven, or air fryer until heated through and slightly crisp.
Join Small Wonders
Stories, nature, books, family connection, recipes, overlooked history, and the small things that make life feel full.
No schedule. No noise. Just occasional notes when there’s something worth sharing.
